How to use Laravel Queue

Implement laravel queue in your app! Laravel queue works like a background process, making your application much faster, and able to handle other requests. While Laravel handles time-consuming jobs in the queue!
- How to use Laravel Queue
- Introduction to Laravel Queue
- Why should you use Laravel Queue?
- Adjust the Upload Model and Upload Controller
- Create and run the migration for the new field
- Change the Upload Model
- Change the Upload Controller
- Add the new field to React Form component
- Change the state
- Append the emails to the FormData object
- Add the field to the form
- Create Laravel Mail Class
- Create Laravel Mail view
- Creating the Laravel Queue Migration
- Running the Laravel Queue Migration
- Adjusting the env file for Laravel Queue usage
- How to create a Laravel Queue job
- How to dispatch Laravel Queue job
- How to run Laravel Queue
- Conclusion
Introduction to Laravel Queue
I have implemented the Laravel Queues in the application I was building while writing this post. In addition to implementing Queues, I have also added one field where users can write comma-separated emails with whom they would like to share the uploaded document.
Why should you use Laravel Queue?
I would like to cover this post section with some statistics. The screenshot below shows the request for uploading one document and sending nine emails with that document included as an attachment. After storing the file on our server and creating a database record, we would take the array of shared emails, loop through it and send an email to each email.
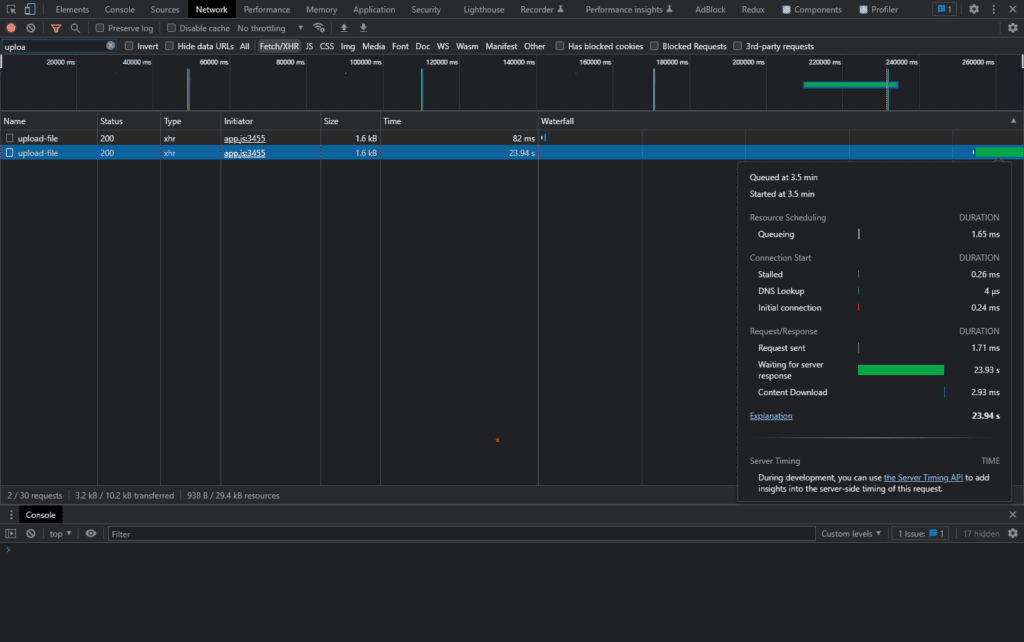
It would take 23.94 seconds to send nine emails with attachments. Take into consideration that this was done on my local host and using MailTrap.io to imitate email sending. So it would take even more if the application was on some server. So our application is unresponsive to this user for ~24 seconds, while he waits for the emails to be sent. Now let’s take a look at how long it would take to get our application back using Laravel Queues.
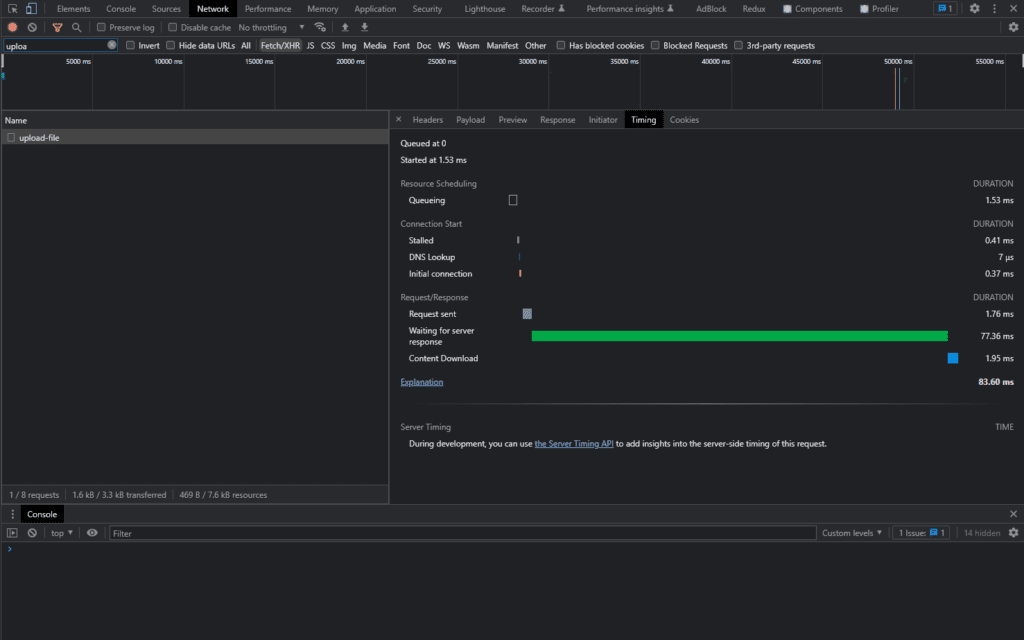
It would take a ridiculously 83.6 ms for our app to be usable again. Not even a full second. Bear in mind that this 83 ms is not the duration of sending those emails. However, it’s just time that we need to get our queues to work on that job. Then they will do that job in the background.
Adjust the Upload Model and Upload Controller
We want to be able to share our documents with other people. In order to do that we will create a migration to add a new column to the uploads table that we have previously created in this post.
Create and run the migration for the new field
Name the migration however you want and in the up() method paste the following code.
Schema::table('uploads', function (Blueprint $table) {
  $table->json('emails')->nullable()->after('description');
});We are creating a JSON column that’s going to be nullable and we are placing it after description column.
Why do we create a JSON column? Well because it’s going to give us a nice structure in the database like so:
["djordje@djolecodes.com", "office@djolecodes.com", "belgradeOffice@djolecodes.com"]and it’s really easy to work with because of the Laravel casts in the model that we are going to set up. Don’t forget to run the migration using the artisan migrate command.
php artisan migrateChange the Upload Model
Now in the model, we are going to change just the fillable array and we are going to add the casts array. So our model will look like this
class Upload extends Model
{
  use HasFactory;

  protected $fillable = [
    'name',
    'path',
    'description',
    'user_id',
    'emails'
  ];

  protected $casts = [
    'emails' => 'array'
  ];
}
Change the Upload Controller
For the upload controller, we need to change the store method. Firstly we need to set up validation like this:
'emails' => 'nullable|string',secondly, we are going to trim the array of emails by using array_map like so:
$emailsArr = array_map('trim', explode(',', $request->get('emails')));thirdly we are going to store the array of emails in the database:
$newUpload = Upload::create([
        'name' => $file->getClientOriginalName(),
        'description' => $request->get('description'),
        'emails' => $emailsArr,
        'path' => $documentPath['public_path'],
        'user_id' => $uploader->id
]);lastly, our email is expecting a user to be a type of User model so we are going to change
$uploader = auth()->user();
// to
$uploader = User::find(auth()->user()->id);Add the new field to React Form component
Since we are done with the backend for now we are going to adjust the front end to have the email field.
Change the state
At the beginning of our function, we are going to add the state handlers, so using destructuring let’s use the useState() hook.
//...
const [emails, setEmails] = useState();
//...Append the emails to the FormData object
When our state changes and the user clicks upload we are going to append the email data to the FormData object that we have created in the previous post.
formData.append("emails", emails);Add the field to the form
Lastly, we need to add the textarea field to the JSX form. So just under the description field add the following code
<div className="col-12">
    <label htmlFor="description">Emails</label>
    <textarea
        className="form-control"
        name="description"
        value={emails}
        onChange={(e) => setEmails(e.target.value)}>
		</textarea>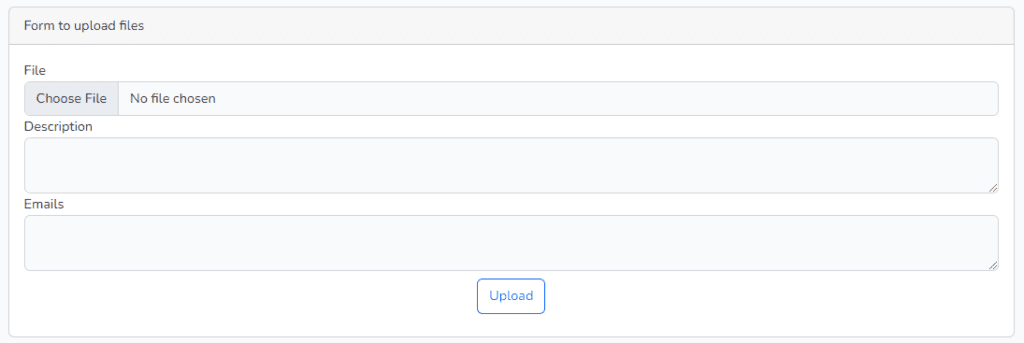
</div>We are using destructured emails variable as our field value and setEmails function in our onChange event that uses the arrow function. Now we are all set up, if you run the application in your browser you will be able to see the new field under the description field.
Create Laravel Mail Class
Since we are going to send emails with our job we need to create Laravel mail. Firstly we need to run the following command:
php artisan make:mail SharedEmailsSecondly, this will create a new class in the app/mail directory, called SharedEmails.
Now that we have created our mail template we are going to use it inside our SharedEmails class, which has two methods like the Job class. We again have the constructor method and build method.
<?php

namespace App\\Mail;

use App\\Models\\Upload;
use App\\Models\\User;
use Illuminate\\Bus\\Queueable;
use Illuminate\\Mail\\Mailable;
use Illuminate\\Queue\\SerializesModels;

class SharedEmails extends Mailable
{
  use Queueable, SerializesModels;

  private User $user;
  private Upload $document;

  /**
   * Create a new message instance.
   *
   * @return void
   */
  public function __construct(User $user, Upload $document)
  {
    $this->user = $user;
    $this->document = $document;
  }

  /**
   * Build the message.
   *
   * @return $this
   */
  public function build()
  {
		// Generate the array from the document path
    $dbPath = explode('/', $this->document->path);
		// Take only the file name from the document path
    $fileName = end($dbPath);
    return
      $this->view('mail.shared_emails')
        ->attach(storage_path('app/public/uploads/' . $this->document->user_id . '/' . $fileName)) // use the document path to attach the file to the email
        ->with(['user' => $this->user, 'document' => $this->document]);
  }
}
When we create the instance of this class we need to pass two things to it as you can see user and document. After that in a build method we are extracting the file name from the path that’s stored in the database, we are creating the attachment, and pass down the user and document to the template.
Lastly, we are going to create a template for our email. Create a new folder called mail in /resources/views/ and inside create a new file called shared_emails.blade.php.
Create Laravel Mail view
This will be the view for our email, and we are going to keep it really simple. Open up your shared_emails.blade.php and paste the following code.
<div>
    <h1>Hey there is a shared document</h1>
    <p>The {{ $user->name }} shared a document {{ $document->name }} with you.</p>
    <p>Cheers!:)</p>
</div>Creating the Laravel Queue Migration
To start with Queues, we need to create the migration for Queue tables. And then run it. We are using a Database driver for running queues. This means that all jobs will be stored in our database, in the table for which we are generating the migration using an Artisan command below.
php artisan queue:tableThis command will create migration in the database/migrations folder. I haven’t changed it I’ve just used the default one.
Running the Laravel Queue Migration
Since Laravel created migration for us we just need to run it, like we would run a usual migration.
php artisan migrateAfter running this you can see in your database that we have two new tables.
- failed_jobs
- jobs
Failed jobs will be used to store our failed jobs as its name state. And the jobs table is used for all the jobs we ran successfully. And it’s usually empty as we run our jobs.
Adjusting the env file for Laravel Queue usage
As I’ve mentioned above we are going to use the database as our storage for queue jobs, but we need to tell our app that we are going to do that. We can do that by changing the .env file.
QUEUE_CONNECTION=databaseFind this environment variable and change its value to database. After doing that don’t forget to purge the config cache by running any of these two commands below.
php artisan config:cache
php artisan optimize:clearHow to create a Laravel Queue job
Now we are going to create our first job. So let’s kick off with the artisan command that will do that for us.
php artisan make:job SendEmailThis command will create the class with the same name SendEmail inside app/jobs folder. The command creates the job folder automatically, so no need to do that by yourself.
When we create the job we end up with the class that has a __construct() method as well as the handle() method.
The constructor we can use to initialize all the class properties that we are going to use in our job class. The handle() method is where we are doing our job.
<?php

namespace App\\Jobs;

use App\\Mail\\SharedEmails;
use App\\Models\\Upload;
use App\\Models\\User;
use Illuminate\\Bus\\Queueable;
use Illuminate\\Contracts\\Queue\\ShouldBeUnique;
use Illuminate\\Contracts\\Queue\\ShouldQueue;
use Illuminate\\Foundation\\Bus\\Dispatchable;
use Illuminate\\Queue\\InteractsWithQueue;
use Illuminate\\Queue\\SerializesModels;
use Illuminate\\Support\\Facades\\Mail;

class SendEmail implements ShouldQueue
{
    use Dispatchable, InteractsWithQueue, Queueable, SerializesModels;
    private User $user;
    private Upload $document;
    /**
     * Create a new job instance.
     *
     * @return void
     */
    public function __construct(User $uploader, Upload $document)
    {
        $this->user = $uploader;
        $this->document = $document;
    }

    /**
     * Execute the job.
     *
     * @return void
     */
    public function handle()
    {
        foreach ($this->document->emails as $email) {
            Mail::to($email)
            ->send(new SharedEmails($this->user, $this->document));
        }
    }
}
In the constructor above we are setting the class properties that we need. In the handle() method, we are looping through the array of emails, and sending the emails with the SharedEmails class that we created before.
How to dispatch Laravel Queue job
In order to use our newly created queue job we need to dispatch it. And we can do that by changing our UploadController. In addition to the previous changes you made to the upload controller, add the following code after saving a new record to the database.
if (!is_null($request->get('emails'))) {
   $job = new SendEmail($uploader, $newUpload);
   $this->dispatch($job);
}We are instantiating SendEmail class and we are dispatching that job, by using the dispatch() method.
How to run Laravel Queue
Laravel Queue needs to listen for incoming jobs, therefore we need to run the artisan command
php artisan queue:listen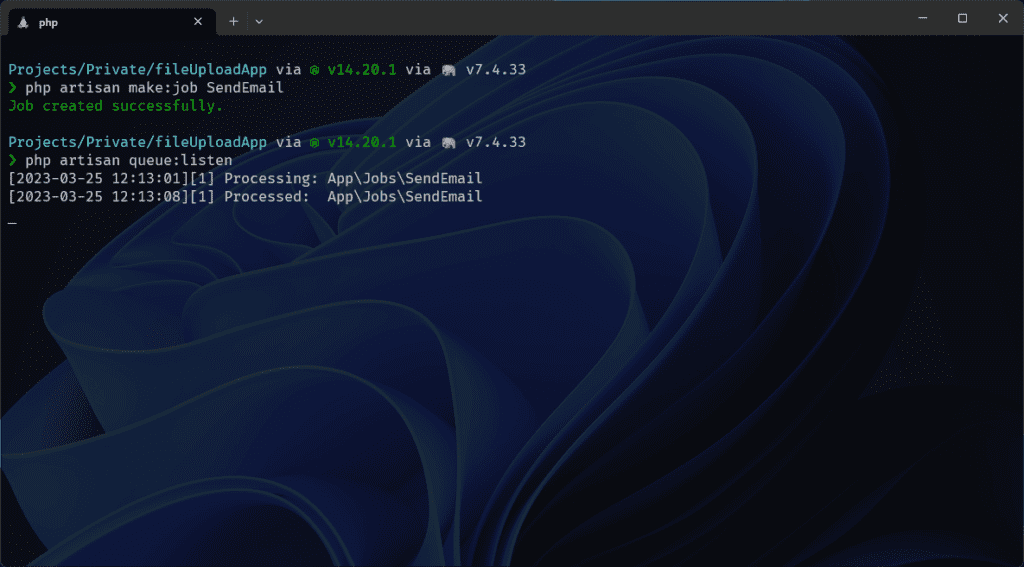
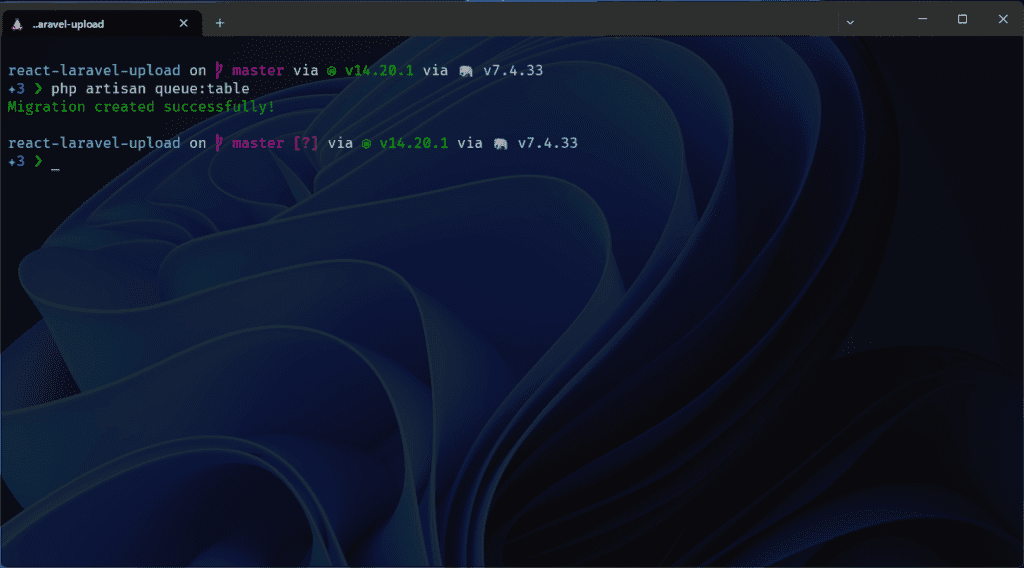
As you can see in the above screenshot this command keeps my terminal window busy while it listens for incoming queues. You can also use this to monitor your laravel queue
Conclusion
Well, that’s it for this post, I think the conclusion is pretty clear. We are living in a world where everything happens really fast, so our apps need to be faster. You don’t want to keep your app stuck for 24 seconds, where a user can’t do anything in that period of time, where you can put that job in a queue and get back to serve other requests. I just have to say that this is just surface scratching, there is a really good book by Mohamed Said on Laravel Queues. That’s explaining Laravel Queues in-depth, you should definitely check that out.


