10 Essential DOM Manipulation JavaScript Techniques

To create dynamic applications with JavaScript. You need to know DOM manipulation techniques in JS. Period. 🥸 Hehe, so without further ado lets jump right in!
- 10 Essential DOM Manipulation JavaScript Techniques
- What is DOM – Document Object Model?
- Tree-like structure
- Techniques for manipulating the DOM
- Getting The Elements
- Get elements by Tag names
- Get elements by attributes
- Get element by Id
- Get element by class
- Get input element by name
- Get element by custom attribute
- Modify the elements using JavaScript
- Modify text using JavaScript
- Changing DOM elements by adding or removing the attributes
- Adding or removing the CSS classes from DOM elements
- How to change an element style with JavaScript
- Easiest way to create HTML elements using JS
- What can you build now?
On your development roadmap, all people (I included) say to you, you need JS to make your page dynamic. And it’s absolutely true! This post will explore ten techniques you need to master to make your web pages dynamic and create complex User Interfaces. However if all this is overwhelming and you don’t know where to start, but you want to be front-end or backend developer check out my developer roadmaps. That being said let’s move on!
What is DOM – Document Object Model?
To understand how to manipulate it, we first have to know what Document Object Model is. DOM as its name states the Object model that’s part of every web page out there. It’s an HTML document, that has a tree-like structure, and developers like you and me can manipulate that structure. We can change the element’s content, remove them, make them do things, apply styles to them, etc.
Tree-like structure
This means that all the elements are nested within one root element and that is <html></html>. This element holds together all the other elements, making it a root element. The other elements are all nested within each other and they are all nested within the <html> element.
Techniques for manipulating the DOM
Now when we explain what the DOM is we can list the techniques of how we can manipulate the DOM. Most of the methods we are going to explore are document methods. Methods called on the document object itself.
Getting The Elements
When we have an HTML page we have a lot of elements inside. In order to get them from JavaScript we need to use some attributes of those elements. Let’s take the following code for example:
<div id="container">
	<h1 class="title">Hello!</h1>
	<p>World!</p>
</div>Get elements by Tag names
We can use just a tag name to get the elements. But for me, it’s not so reliable, and I don’t know which element I am getting. I don’t have anything against it, I just like to add at least one more attribute like class, anything that will make sure I am not getting a bunch of things that I don’t want.
document.getElementsByTagName('p');
document.querySelectorAll('p');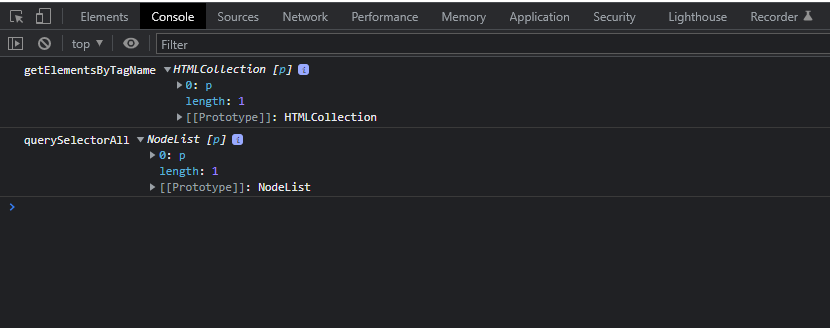
Get elements by attributes
Most of the time we are going to get the elements by id or class. Ids are unique attributes while classes can repeat.
Get element by Id
To get the container element by its ID we can use the following code.
document.getElementById('container');or we can use the following approach, which for me is much better.
document.querySelector('#container');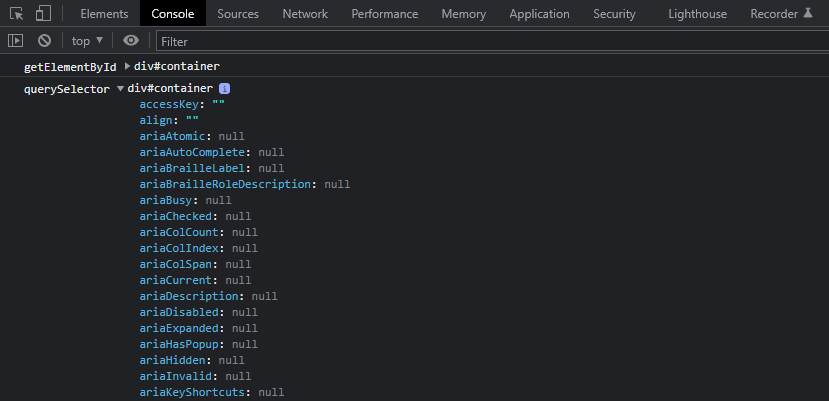
⚠️CSS Selector
Note the # before the id. That’s because the querySelector method uses a CSS selector, making it more powerful. Since it can use all the selection techniques that you can do in CSS.
Get element by class
Since we said that classes can repeat that means that we can get more than one element with the same class.
document.getElementsByClassName('title');This method is doing the job, that’s not a problem, but be careful how you use it since it doesn’t return an array of elements but the elements list. And you can’t loop through that list. That’s why I prefer to use querySelectorAll().
document.querySelectorAll('.title');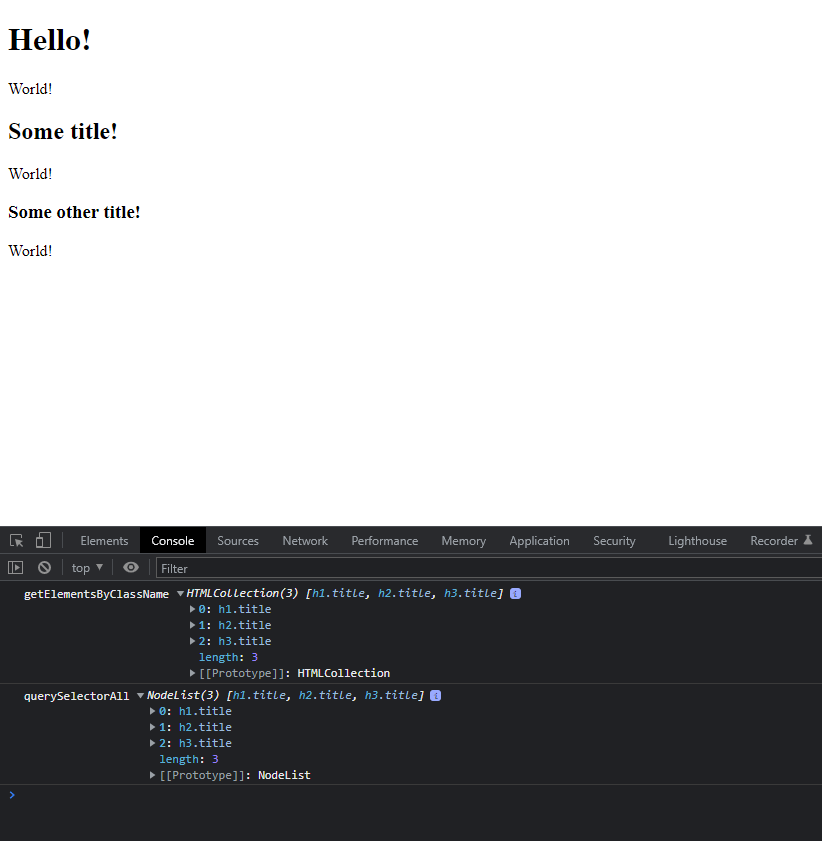
This method returns a NodeList which is iterable and you can loop through that one with forEach method for example, more on this subject later in the post.
❓querySelector or querySelectorAll
If you use the querySelector method with CSS class you will be getting only the first element that has that class, so heads up! We are using the querySelectorAll method for this task.
Get input element by name
There are times when it’s really useful to get the input, select, textarea elements by their name attribute. Imagine you are using some CMS or some other backend and you can’t set the class or control the HTML that’s on the page.
Just to explain we are usually using the name attribute because it’s unique due to submitting requests to the server. So we have fields like this
<input type="text" name="title" />

<select name="sports">
	<option value="1">Football</option>
	<option value="2">Basketball</option>
	<option value="3">Tenis</option>
</select>

<textarea name="note">"Some text..."</textarea>All of these elements above ☝🏼 we can get using the name attribute. Let’s check the code below, for this, we are going to use only the querySelector method.
document.querySelector('input[name="title"]');
document.querySelector('select[name="sports"]');
document.querySelector('textarea[name="note"]');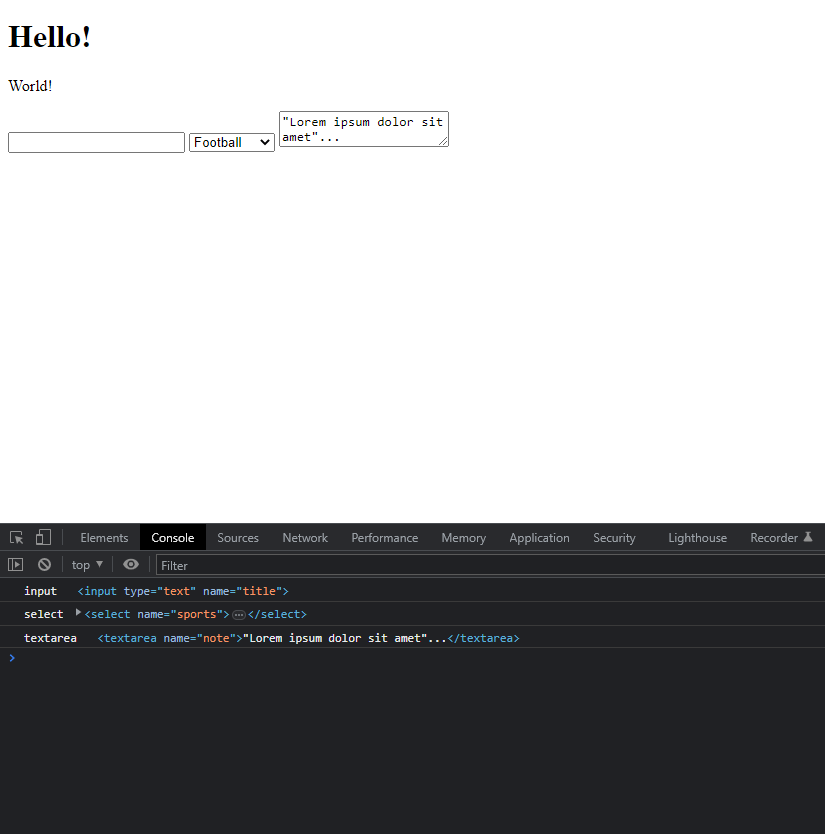
The syntax is always the same on the current document we are calling querySelector, brackets, and then basically CSS selector inside, and the quotes of course. It can be as we saw:
- id,
- class,
- tag,
- attribute like name
except for the attribute like name, it’s a bit different syntax for the selector. We are saying give me all the input elements that have name attribute equal to title.
Get element by custom attribute
Did you know we can have custom attributes like data-username=”John”? Well, we can! That’s pretty cool for a number of reasons. We can pass the data around, or we can get the elements like this.
<ul id="tasks">
	<li data-isFinished="true">Feed the 🐢</li>
	<li data-isFinished="false">Calculate expenses 🧮</li>
	<li data-isFinished="true">Pack the bags 🎒</li>
</ul>Now in Javascript, we can use something like this to get only the finished tasks.
document.querySelectorAll('li[data-isFinished="true"]');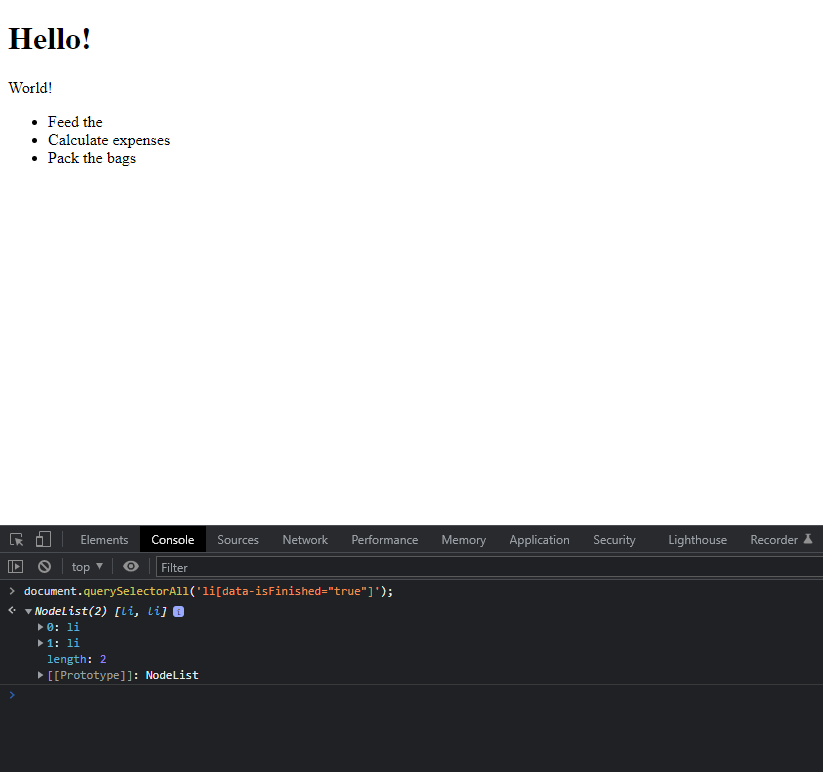
And just like that, you got only the tasks that are done!
🎯At the end what to use to select element(s) in JavaScript?
Well you can use whatever you’d like. It’s a free world! Friendly advice use querySelector and querySelectorAll. For a couple of reasons, you can use whatever css selector you need, not only classes and ids. You can loop through the results.
Modify the elements using JavaScript
Now that we know how to get the elements, it’s time to learn how to modify them. We are not going to modify the whole elements just the pieces of them. Since HTML is the markup language that uses tags we are going to modify what’s between those tags or some attributes etc.
Modify text using JavaScript
When we get the HTML element we can change the inner structure or value, basically whatever is between its tags. For that, we are going to use two properties of the element innerText
<p id="text">This is some paragraph!<p>Now in your JavaScript code, we can write something like this:
const paragraph = document.querySelector('#text');
paragraph.innerText = 'This is CHANGED paragraph!';
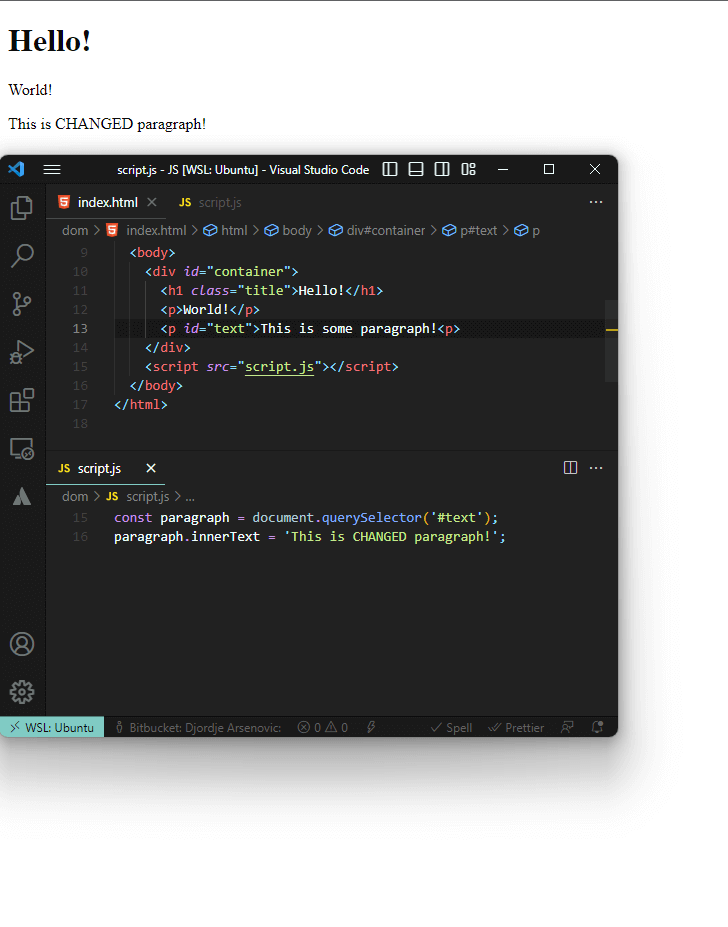
If you run this code you will see that your paragraph changes.
Changing DOM elements by adding or removing the attributes
Like we can use the attributes to get elements, and we can also add new attributes to the elements or change the existing ones. Let’s say we have an element like below
<input type="text" value="" id="task" name="task"/>
but for some reason when there are five tasks we want to disable the field. So in our Javascript code, we could use [setAttribute](<https://developer.mozilla.org/en-US/docs/Web/API/Element/setAttribute>) like this:
const task = document.querySelector('#task');
const tasksArr = [1,2,3,4,5];
if (tasksArr.length >= 5) {
	task.setAttribute('readonly', 'readonly');
}We can set the attribute to readonly if some condition is met, for example, imagine we have an array of tasks, and if there are five tasks already created we want to prevent the user from adding more tasks to the array.
Like we can add the attributes we can also remove them or check if the element has the attribute. So I am going to refactor the code above a little bit, so we can show the use-case for the hasAttribute and removeAttribute methods.
const task = document.querySelector('#task');
const tasks = [1,2,3,4,5];
if (tasks.length === 5) {
	task.setAttribute('readonly', 'readonly');
} else {
	if (task.hasAttribute('readonly')) {
		task.removeAttribute('readonly');
	}
}Adding or removing the CSS classes from DOM elements
Even though CSS classes are attributes, I wanted to keep them separated because we change them in another way. We are using the classList property of the element. The type of data that this property holds is DOMTokenList.
We are using addClass to add classes to the elements and removeClass to remove them. First, we are going to add a class to the task field that we mentioned in the code above. And then we are going to remove it.
const task = document.querySelector('#task');

if (!task.value) {
  task.classList.add('validation-error');
}
task.addEventListener('keyup', e => {
  if (e.target.value === '') {
    task.classList.add('validation-error');
    return;
  }
  task.classList.remove('validation-error');
  return;
})You can also use:
.add("foo", "bar", "baz");         // To add multiple classes at once
.remove("foo", "bar", "baz");     // To remove multiple classes at once
.add(...classes);                // ES6 spread operator to add an array of classes at once
.replace("foo", "bar"); // To replace the class foo with class barHow to change an element style with JavaScript
In addition to adding classes to an element that contain some CSS. We can also change styles directly, although I am not a fan of the because I like them separated, I am using them sometimes.
if (checked) {
  taskText.style = "text-decoration:line-through;";
} else {
  taskText.style = "text-decoration:unset;";
}In the above example, we are changing the style of the element, where we set or unset the text decoration based on the given condition.
Easiest way to create HTML elements using JS
You can create the elements using the createElement function, but I think it’s much easier and much more clear to use the ES6 template strings. Between ““ (backticks) you can write HTML, and you can format it, however, you’d like, as well as additional attributes you want like you would in the HTML file.
We can create the template with template strings with the HTML that we want to add like this:
const tpl = `
  <li class="list-item">
      <input type="checkbox" class="mark-done"/>
      <span>${todoValue}</span><button class="delete-task">Delete</button>
  </li>
`;As you can see I am adding the list item with the checkbox and the span with dynamic value using the following syntax ${todoValue}. Between the curly braces, you can place whichever variable you want as well as the Javascript expression that you want to execute.
Want to learn more about ES6 functions and how to write better JS code? Checkout this post!
Then you get the element where you would like to insert the created HTML template, and use the insertAdjacentHTML method like below:
const todoList = container.querySelector("ul.todo-list");
todoList.insertAdjacentHTML("afterbegin", tpl);The first argument is the place where you would like to insert it and the second is the HTML that you would like to insert. For the first argument, you have several options:
beforebegin➡️ before the opening tag of the element that you got beforeafterbegin➡️ after opening the tag of the element that you are inserting tobeforeend➡️ before the closing tag of the element that you are inserting toafterend➡️ after the closing tag of the element that you got before
On MDN there is the following schema:
<!-- beforebegin -->
<p>
  <!-- afterbegin -->
  foo
  <!-- beforeend -->
</p>
<!-- afterend -->
What can you build now?
Using all of this knowledge, now you are able to code something like the application below. It’s a todo application that allows you to add or delete the todos. I am giving you a challenge to do this by yourself, or you can check out my code. But I think it’s really important to do it yourself because that’s how you grow the most.
See the Pen Vanilla JS todo application by Djordje Arsenovic (@djolecodes) on CodePen.


Adding or removing the CSS classes from DOM elements
The Document method querySelector() returns the first Element within the document that matches the specified selector, or group of selectors. If no matches are found, null is returned.
Hi Michel, yes the querySelector indeed returns null if the element has not been found. For the sake of simplicity I am not checking if the element is there or not. Because I know it is. 😀
First if statement is checking the initial value. Then on keyUp event we check if the e.target.value exists by comparing it to an empty string.
If the data doesn’t exist we are adding the error class, else we are removing it. There is a video beneath the code showing the css class appear and dissapears based on field value.
I hope this clarify the issues more, if you have any doubts please let me know!