Mastering HTTP Tests in Laravel & Inertia with Pest
Master robust HTTP tests for your Laravel & Inertia apps with Pest. Learn to test success paths, validation errors, and Inertia props with confidence. Dive in!
- Mastering HTTP Tests in Laravel & Inertia with Pest
- Introduction
- Understanding Laravel's Testing Landscape: HTTP vs. Unit vs. Browser Tests
- Getting Started with Pest PHP: Installation & Setup
- What are we testing?
- The "Happy Path": Creating a Category with Inertia.js
- Handling Validation Errors: When Things Go Wrong (Gracefully)
- Running the tests
- Conclusion: Confident Laravel & Inertia Development
Introduction
Are you building modern web applications with Laravel and Inertia.js? Then you know the power of a unified backend and frontend. But when it comes to testing, do your feature tests truly reflect your users’ experience? In this comprehensive guide, we’ll dive deep into writing robust HTTP (Feature) tests for your Laravel and Inertia applications using the delightful Pest PHP testing framework. From “happy path” scenarios to crucial validation error handling, we’ll ensure your application stands strong.
Understanding Laravel’s Testing Landscape: HTTP vs. Unit vs. Browser Tests
Before we jump into code, let’s clarify the different types of tests you’ll encounter in a Laravel project. Knowing their purpose helps you choose the right tool for the job:
HTTP Tests (Feature Tests):
Purpose: These tests simulate HTTP requests to your application’s routes. They interact with your entire Laravel stack – routing, middleware, controllers, database, and even your Inertia responses.
Focus: Verifying that your application’s features work correctly from an external perspective, much like a user or another application would interact with it. They bridge the gap between your backend logic and how data is presented.
When to use HTTP Tests a.k.a Feature Tests
Ideal for testing API endpoints, form submissions, redirects, authentication flows, and ensuring the correct Inertia components and props are returned. Our focus today will be primarily on HTTP Tests.
Unit Tests:
Purpose: These tests focus on isolated, individual units of your code, like a single method in a class, a service, or a small helper function. They typically don’t touch the database or send HTTP requests.
Focus: Ensuring the internal logic of a specific piece of code behaves as expected, often using mocks or stubs to isolate dependencies.
When to use Unit Tests
Testing complex algorithms, domain logic, data transformations, or public methods on models or services.
Browser Tests (End-to-End Tests):
Purpose: These tests simulate actual user interactions in a real browser environment (using tools like Laravel Dusk or Cypress). They click buttons, fill forms, and observe visual changes on the screen.
Focus: Validating the complete user journey, from clicking links to asynchronous JavaScript updates, ensuring the frontend (React, Vue, Svelte) interacts seamlessly with the backend.
When to use Browser Tests
Critical user flows, complex multi-step forms, or anything that heavily relies on client-side JavaScript. While powerful, they are slower and more complex to maintain than HTTP tests.
Getting Started with Pest PHP: Installation & Setup
Pest offers a beautifully expressive syntax that makes writing tests a joy. If you’re not already using it, installation is quick and easy.
Step 1: Install Pest via Composer
composer require pestphp/pest --dev --with-all-dependenciesStep 2: Initialize Pest
php artisan pest:installThis command will create a tests/Pest.php file, which is where some of Pest’s global configurations live.
Step 3: Configuring the tests/Pest.php File
Open tests/Pest.php. You’ll typically find a section similar to this:
<?php

use Illuminate\Foundation\Testing\RefreshDatabase;
use Tests\TestCase;

/*
|--------------------------------------------------------------------------
| Test Case
|--------------------------------------------------------------------------
|
| The closure you provide to your test functions is always bound to a specific PHPUnit test case.
| If you need to access methods on the test case, you can define 'uses()' and you be able to
| access those methods without having to define a class.
|
*/

uses(TestCase::class)->in('Feature');
uses(RefreshDatabase::class)->in('Feature'); // Ensure this line is present or add it!

/*
|--------------------------------------------------------------------------
| Expectations
|--------------------------------------------------------------------------
|
| When you're writing tests, you often need to check that values meet certain conditions. The
| provided expects() function makes calling assertions a breeze. You can place any of your
| custom expectations here:
|
*/

// ... other configurationsThe crucial lines here are uses(TestCase::class)->in('Feature'); and uses(RefreshDatabase::class)->in('Feature');. These tell Pest to apply your base Tests\TestCase class (and the RefreshDatabase trait for a clean database) to all your feature tests, making all of Laravel’s testing helpers available.
What are we testing?
Before we jump into writing tests, I wanted to give you an example of what we are going to test. Although it’s a fairly simple example, it’s not an uncommon one. It’s a real-world case, not like the 2+2 = 4 functions that we are all used to in the tutorials for writing tests.
Let’s say that you have some application that is using Categories in some way. It can be a Task Manager app, or Recipe App, or something else entirely. You will probably have the Category Controller with the store() method, which will be used to store the categories in the database.
    /**
     * Store a newly created resource in storage.
     */
    public function store(Request $request)
    {
        $valid = $request->validate([
            'name' => 'required|string|max:50',
            'icon' => 'required|string|max:50',
            'type' => 'required|string|max:3',
        ]);

        $valid['user_id'] = $request->user()->id;

        $created = Category::create($valid);

        return to_route('categories.index')->with(['message' => [
            'text' => "Category $created->name created successfully.",
            'status' => true
        ]]);
    }
As you can see, we have three fields here: name, icon, and type. With some validation, if that validation passes, we are saving the category to the database. So, in this case, we want to make sure that the following things are correct. Below is the list of steps that we are going to test.
The “Happy Path”: Creating a Category with Inertia.js
Let’s start with a positive scenario: a user successfully creates a category. This test will demonstrate a full POST-Redirect-GET flow, including Inertia-specific assertions.
Scenario: A logged-in user submits a valid form to create a new category, is redirected to the categories index page, sees the new category, and receives a success message.
<?php

use App\Models\Category;
use App\Models\User;
use Inertia\Testing\AssertableInertia as Assert;

test('authenticated user can create a category and see it on the index page with a success message', function () {
    // 1. Arrange: Set up our test environment
    $user = User::factory()->create(); // Create a user
    $this->actingAs($user); // Log in the user
    $newCategoryName = 'Test Category';
    $emoji = fake()->emoji(); // Generate a random emoji for the icon

    // 2. Act: Make the POST request to create the category
    $postResponse = $this->post(route('categories.store'), [
        'name' => $newCategoryName,
        'icon' => $emoji,
        'type' => 'exp', // Example type, e.g., 'exp' for expense
    ]);

    // 3. Assert Backend: Verify the POST request's direct outcome
    $postResponse->assertStatus(302); // Expect a redirect (302 Found)
    $postResponse->assertRedirect(route('categories.index')); // Ensure it redirects to the correct route

    // 4. Act: Follow the redirect to the index page (simulates browser behavior)
    // This is crucial for Inertia tests on POST-Redirect-GET flows.
    $categoriesPageResponse = $this->get(route('categories.index'));

    // 5. Assert Frontend (Inertia): Check the loaded Inertia component and its props
    $categoriesPageResponse->assertStatus(200); // The GET request should be successful
    $categoriesPageResponse->assertInertia(fn (Assert $page) => $page
        ->component('categories/Index') // Verify the correct Inertia component is loaded
        ->has('categories') // Check if the 'categories' prop exists
        ->where('categories', fn ($categories) => // Use a closure to robustly check the 'categories' array
            collect($categories)->contains('name', $newCategoryName) // Ensure our new category is present
        )
        ->has('flash.message') // Check for the flashed 'message' under 'flash' prop
        ->where('flash.message.text', "Category $newCategoryName created successfully.") // Verify message content
        ->where('flash.message.status', true) // Verify message status
    );

    // 6. Assert Database: Confirm the data was persisted correctly
    $this->assertDatabaseHas('categories', [
        'name' => $newCategoryName,
        'icon' => $emoji,
        'type' => 'exp',
        'user_id' => $user->id,
    ]);
});Key Takeaways from the Happy Path:
- POST-Redirect-GET: For Inertia requests involving redirects after form submissions, you must perform a second
GETRequest in your test to simulate the browser landing on the new page. Only this second response contains the Inertia component and its props. assertInertia(): This powerful assertion, provided by Inertia’s testing utilities, allows you to verify the loaded component and inspect all its props using a fluent API.- Robust Prop Assertions: Using closures with
where()(e.g.,where('categories', fn ($categories) => ...)andcollect($categories)->contains(...)) makes your tests resilient to changes in data order. - Flashed Session Data: Inertia typically wraps flashed session data (like our success message) under a
flashprop. Use dot notation (flash.message.text) to access nested values.
Handling Validation Errors: When Things Go Wrong (Gracefully)
Now, let’s explore how to test your controller’s validation rules. Inertia handles validation errors elegantly, sending them back as props to the originating component rather than forcing a full page reload.
Scenario 1: Required Field Missing
A user tries to create a category without providing a name.
<?php

use App\Models\User;
use Inertia\Testing\AssertableInertia as Assert;

test('authenticated user cannot create a category without a name', function () {
    // 1. Arrange: Log in a user
    $user = User::factory()->create();
    $this->actingAs($user);
    $emoji = fake()->emoji();

    // 2. Act: Make an invalid POST request (name field is empty)
    $response = $this->post(route('categories.store'), [
        'name' => '', // Intentionally invalid
        'icon' => $emoji,
        'type' => 'exp',
    ]);

    // 3. Assert Backend: Verify the redirect and session errors
    $response->assertStatus(302); // Still a redirect, but Inertia intercepts it
    // Assert that the 'name' field has an error in the session
    $response->assertSessionHasErrors([
        'name' => 'The name field is required.'
    ]);
    // 4. Assert Database: Ensure no category was created
    $this->assertDatabaseCount('categories', 0);
});Scenario 2: Field Too Long
A user provides a name that exceeds the maximum allowed length.
<?php

use App\Models\User;
use Inertia\Testing\AssertableInertia as Assert;

test('user cannot create a category with a name that is too long', function () {
    $user = User::factory()->create();
    $this->actingAs($user);

    // 1. Make the POST request with a name that is too long
    $response = $this->post('/categories', [
        'name' => 'This name is definitely way too long to pass the fifty character validation rule',
        'icon' => fake()->emoji(),
        'type' => 'exp',
    ]);

    // 2. Assert it's a redirect
    $response->assertStatus(302);

    // 3. Assert there is a validation error for the 'name' field
    $response->assertSessionHasErrors([
        'name' => 'The name field must not be greater than 50 characters.',
    ]);
    // 4. Assert nothing was created
    $this->assertDatabaseCount('categories', 0);
});Key Takeaways for Validation Tests:
assertSessionHasErrors(): This is your primary tool for asserting that specific validation failures occurred. You can pass a string for a single field or an array for specific messages.- Inertia’s
errorsProp: When validation fails, Inertia sends the errors as a top-levelerrorsprop to your component. This is where your frontend framework will typically display them. - No Database Changes: Always assert that the database remains untouched when validation fails.
Running the tests
Well, that was fun. But how do we run the tests we just wrote? Well, there are a couple of ways to do it, and it’s really a developer’s preference. I myself use PhpStorm to develop all of my applications, so I would use that. But I will show you the way of the terminal, because as I said it’s a personal preference, and this could be a thing that everyone can do, regardless of the code editor you use.
To run all the tests, you can use the following command from the terminal:
php artisan testTo run only one test case like our CategoryTest, you can filter out the tests using –filter attribute:
php artisan test --filter=CategoryTestTo run all the tests with coverage, you can use this command:
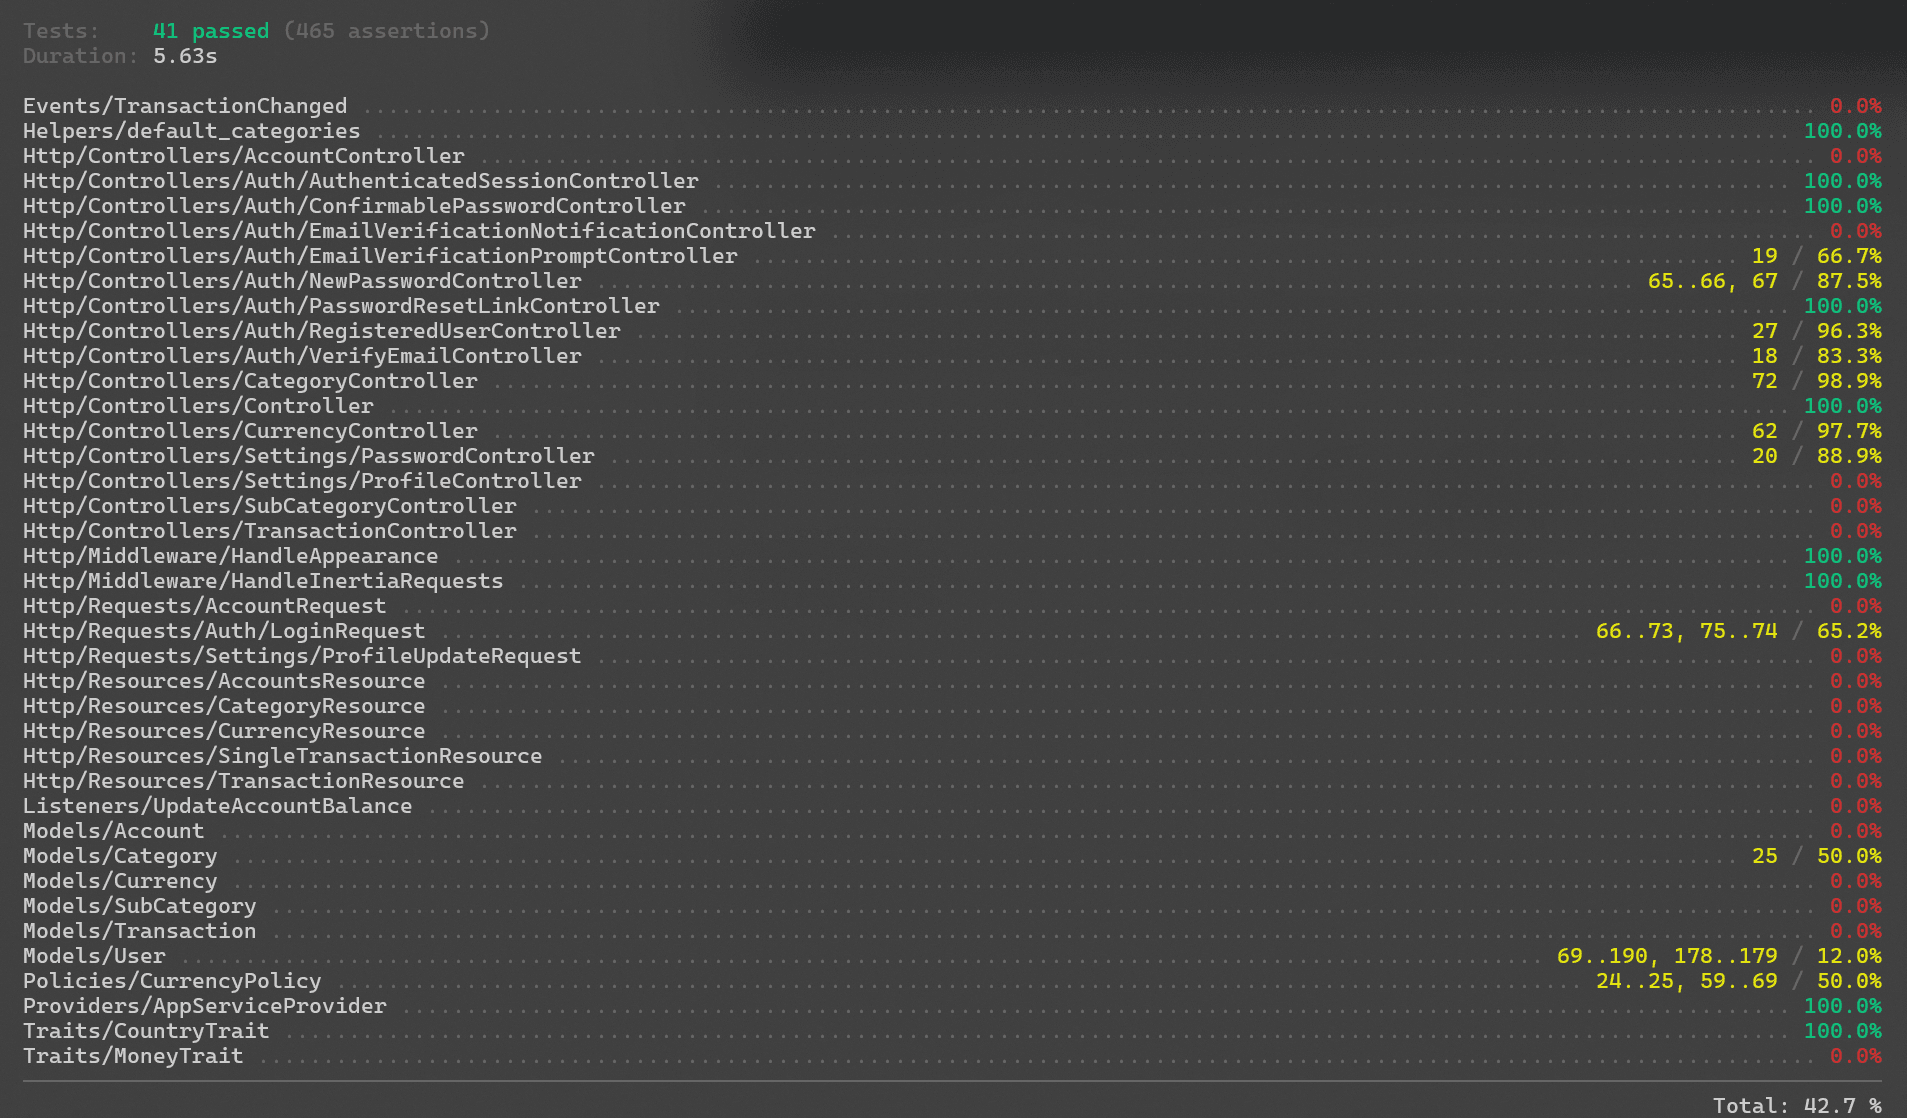
php artisan test --coverageIt will display all the tests with the percentage, and how many lines are covered by your tests.

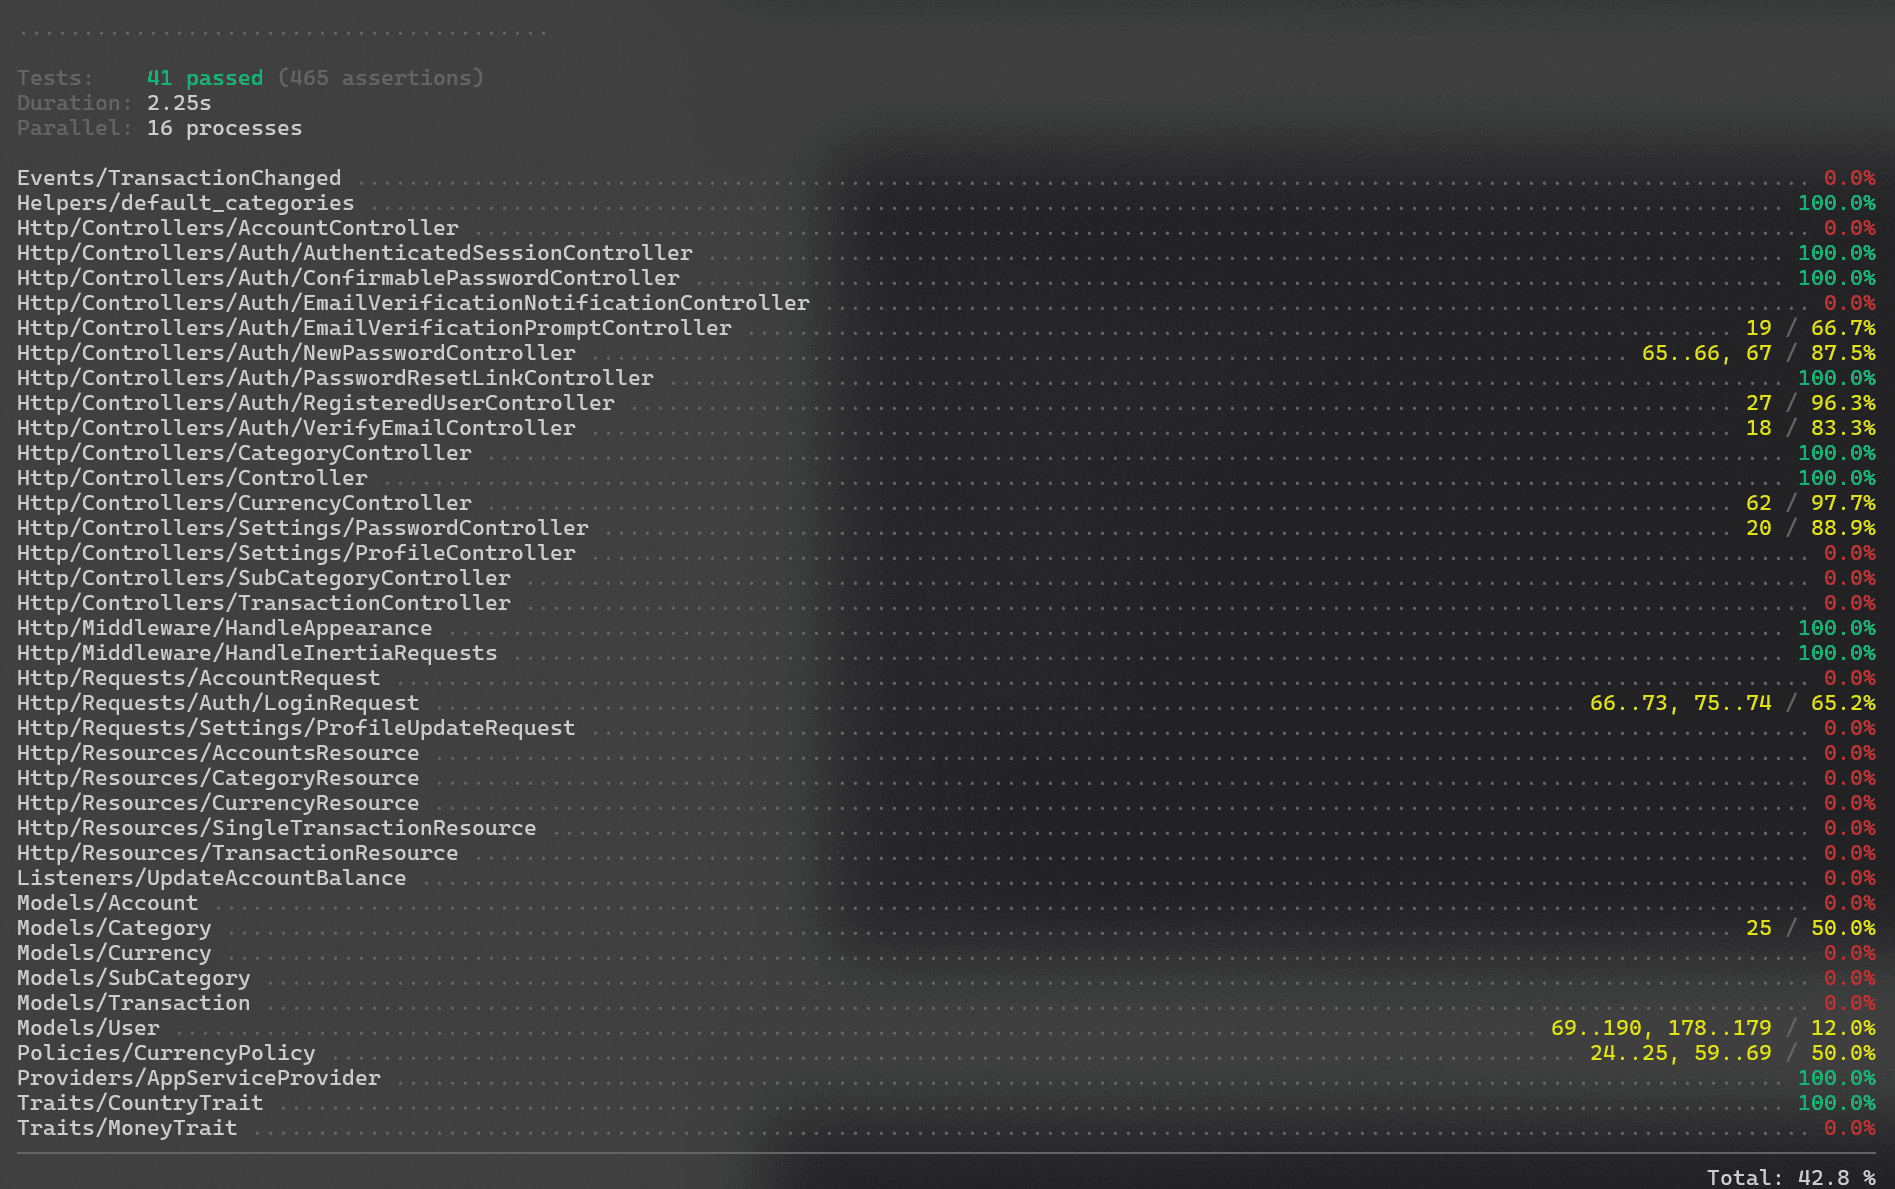
If you are in a hurry, you can probably reduce the time to run the tests in parallel mode. This will run your test concurrently, instead of sequentially.
php artisan test --coverage --parallel
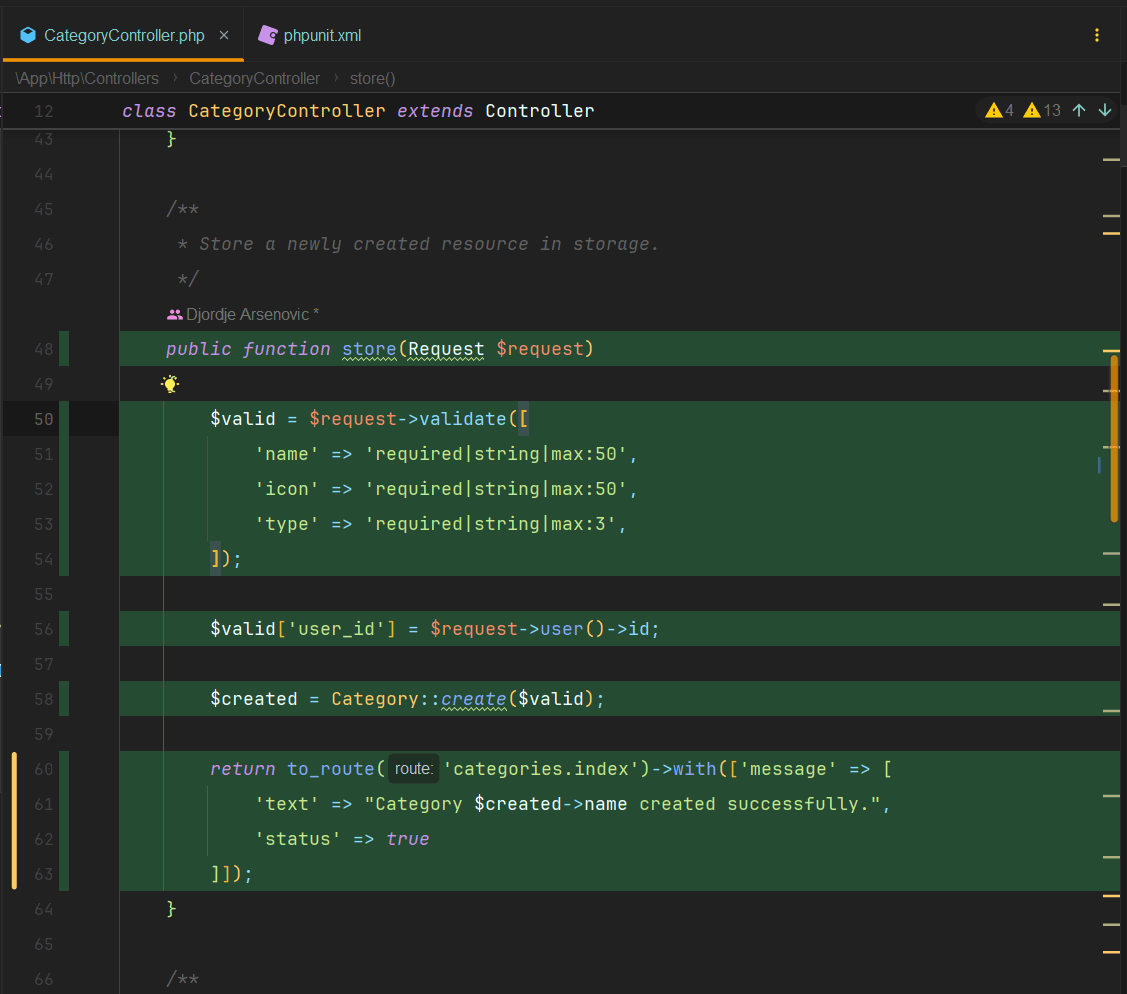
In addition to that, you will have your controller store() method in like following:

Conclusion: Confident Laravel & Inertia Development
By mastering HTTP tests with Pest and understanding how Laravel and Inertia interact during testing, you can build features with confidence. You’re not just testing your backend; you’re ensuring the entire user experience, from form submission to frontend display, works flawlessly.
Embrace these testing techniques, and you’ll find yourself writing more robust, maintainable, and enjoyable Laravel applications. Happy testing!


