Lower Your Hosting Rates Using GitHub Actions on Shared Hosting

Stop paying for expensive VPS hosting just to build your React apps. Learn how to use GitHub Actions automation to deploy modern applications to cheap shared hosting like Hostinger using CI/CD.
Introduction
You just finished building a slick, modern web application using React, Vue, or perhaps a hybrid setup like Laravel and Inertia. It runs perfectly on your local machine.
Now, you need to get it live.
You log into a hosting provider and realize the cheapest plan won’t cut it. Why? Because your plan doesn’t support Node.js, and you can’t run the necessary npm run build command on their server. The hosting provider conveniently suggests upgrading to a Virtual Private Server (VPS) that costs 5x more just to run that one command.
Please don’t do it.
You do not need an expensive VPS to host a static React frontend, or simply to compile assets for a modern monolith like React, Laravel, and InertiaJS. You can use cheap, reliable shared hosting (like Hostinger, Bluehost, or Namecheap) and save hundreds of dollars a year.
The secret is moving the “build process” off your server and onto GitHub Actions. You can literally outsource that job.
The Problem with “Modern” Deployment
In the old days of PHP or plain HTML, deployment meant dragging files into FileZilla. It was tedious, but it worked on any $2/month server.
Today, modern JavaScript frameworks require a “build step.” Your code needs to be compiled, minified, and bundled by tools like Webpack or Vite before a browser can understand it.
If your cheap hosting server can’t run Node.js, it can’t do this build step. This forces many developers into two bad choices:
The Solution: CI/CD Automation with GitHub Actions
The smarter path is automation through CI/CD (Continuous Integration/Continuous Deployment).
GitHub provides a feature called GitHub Actions. Think of these as temporary, disposable computers that GitHub lets you use for free (within generous limits for public repositories).
These temporary computers do have Node.js installed.
The strategy is simple: Instead of asking your cheap hosting server to build your app, we ask GitHub to build it, and then automatically ship the finished product to your server.
The Cost Breakdown
Why go through the trouble of setting this up? The math speaks for itself.
| Hosting Type | Can it Build React? | Typical Monthly Cost | Annual Cost |
| Standard VPS (e.g., DigitalOcean) | Yes | ~$12.00 | $144 |
| Managed PaaS (e.g., Heroku) | Yes | ~$7.00+ | $84+ |
| Shared Hosting + GitHub Actions | No (but, with GitHub Actions, YES!) | ~$2.99 | ~$36 |
Note: The prices shown in the table above are approximate, and can change overtime.
By using GitHub Actions for the heavy lifting, you can utilize shared hosting for what it’s good at: serving static files cheaply and quickly.
Step-by-Step: Setting Up GitHub Actions on Shared Hosting
Let’s set up a workflow that automatically builds a React (using Vite) application and deploys it to shared hosting via FTP whenever you push to the main branch.
Prerequisite: Get FTP Credentials
Log into your shared hosting dashboard (like Hostinger cPanel or hPanel) and find your FTP accounts. You need the Host IP (or domain), Username, and Password.
Step 1: Secure Your Secrets in GitHub
Watch Out!
Never put passwords in your code. We will use GitHub Secrets.
Think of this as a .env file for the repository; you have one for each repository, you won’t be using this anywhere else, and most importantly, this is secure.
Step 2: Create the Workflow File
In your project root, create a specific folder structure: .github/workflows/. Inside that folder, create a file named deploy.yml.
Paste the following code into that file. This is the set of instructions for GitHub’s automation robots.
name: Build and Deploy React App

on:
  push:
    branches:
      - main # Trigger this action only when code is pushed to 'main'

jobs:
  build-and-deploy:
    runs-on: ubuntu-latest # Use a Linux GitHub runner

    steps:
    # 1. Check out your code onto the runner
    - name: Checkout Code
      uses: actions/checkout@v4

    # 2. Install Node.js on the runner so we can build
    - name: Setup Node.js
      uses: actions/setup-node@v4
      with:
        node-version: '22' # Match the version you use locally

    # 3. Install dependencies (npm ci is faster for CI environments)
    - name: Install Dependencies
      run: npm ci

    # 4. Run the build script defined in your package.json
    - name: Build Project
      run: npm run build

    # 5. The magic step: Upload ONLY the built files via FTP
    - name: FTP Deploy
      uses: SamKirkland/FTP-Deploy-Action@v4.3.4
      with:
        server: ${{ secrets.FTP_SERVER }}
        username: ${{ secrets.FTP_USERNAME }}
        password: ${{ secrets.FTP_PASSWORD }}
        # Crucial: Tell it WHERE your built files are locally.
        # Vite usually outputs to './dist/', Create-React-App uses './build/'
        local-dir: ./dist/
        # Where on your server should the files land?
        # Be careful, this usually overwrites the destination folder!
        server-dir: /public_html/
        # Sometimes shared hosting SSL is slow, this helps prevent timeouts
security: looseIf you are using the Laravel, React and InertiaJS stack, make the following changes:
...
local-dir: ./public/build/
server-dir: /public_html/my-awesome-app/public/build/
...You just need to change the local-dir and server-dir, based on where your assets are built.
Possible error!
Make sure that your server-dir ends with a slash, otherwise you will get an error.

It could be the trickiest part, to setup. But you can work it out I am sure of it. Just think about the ftp, if you are using the default one try using it with FileZilla first. Login with your credentials, see the path where it takes you. From that folder where you land with FTP client, build your path to the build directory. If you are creating a new FTP account, double check the path on your hosting platform.
Step 3: Push and Watch It Work
Commit this file and push it to GitHub.
git add .github/workflows/deploy.yml
git commit -m "Setup CI/CD pipeline"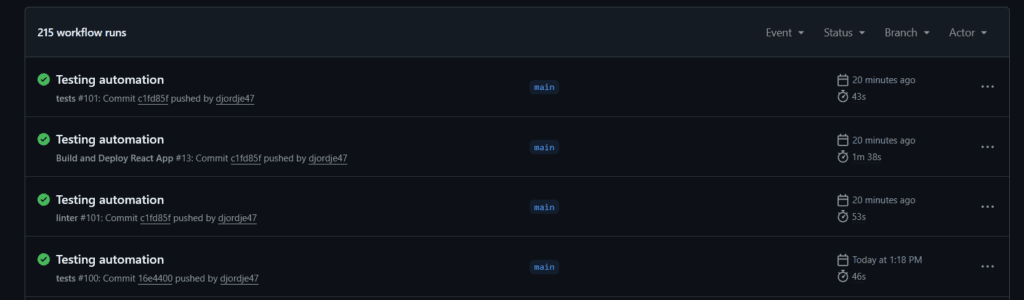
git push origin mainHead over to the “Actions” tab in your GitHub repository. You will see a workflow spin up, install Node, build your React app, and securely FTP the resulting static files to your cheap hosting plan.
Conclusion
Stop manually dragging folders, and stop overpaying for server power you don’t need continuously. By leveraging GitHub for automation, you can enjoy a professional, modern CI/CD workflow while keeping your hosting costs incredibly low. Do the heavy lifting in the cloud, and let your server do what it does best: serve files.

